On day 28 of my Final Fantasy Marathon, I started Final Fantasy IV The After Years. Today, I’m picking up in Ceodore’s Tale, after he returns to Baron Castle.
Mist Cave
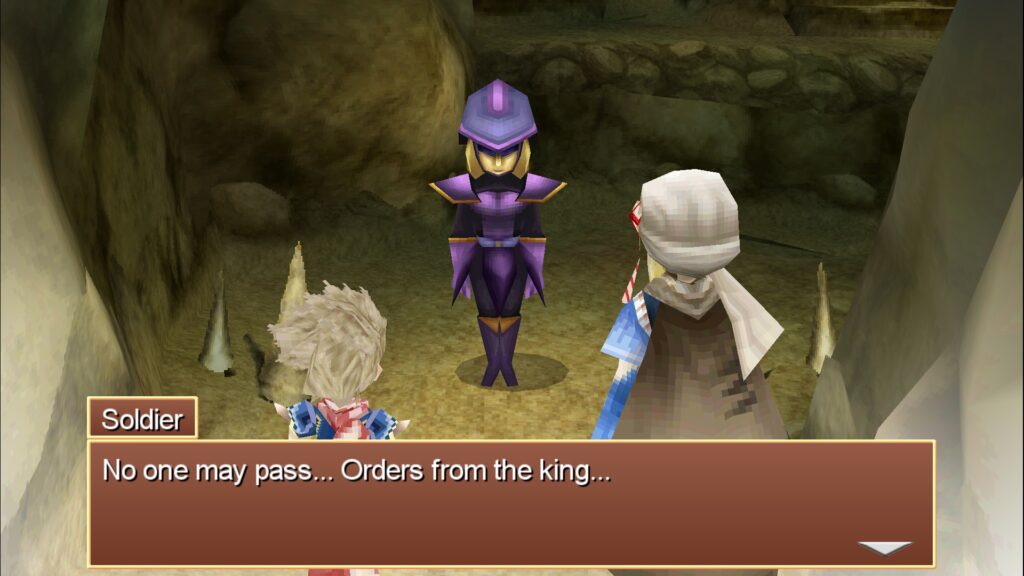
We reach Mist Cave and find a Soldier guarding the entrance. He says the king has ordered him to allow no one entry.
Ceodore says his father would never do that, but the soldier insists. The Hooded Man attacks and the soldier morphs into a monster.
Ceodore is surprised by this, but The Hooded Man is not. We proceed into the cave and find a Steel Helm in a chest, which goes to Ceodore.
The cave shakes as if an earthquake is imminent. The Hooded Man urges Ceodore to hurry.
As we are crossing a bridge, the tremors return and Ceodore falls. The Hooded Man jumps after him.
Ceodore is OK, but we are now in a different part of the cave and must make our way back up. We find some Adamantite in a chest in a hidden room.
I get some Mythril Gloves for Ceodore. The pair level up their Cross Slash Band. We counter a rabbit-like creature that is this game’s version of the Namingways.
It offers to sell me supplies and warns against saving myself into a corner. I find some chainmail in a chest and give it to Ceodore.
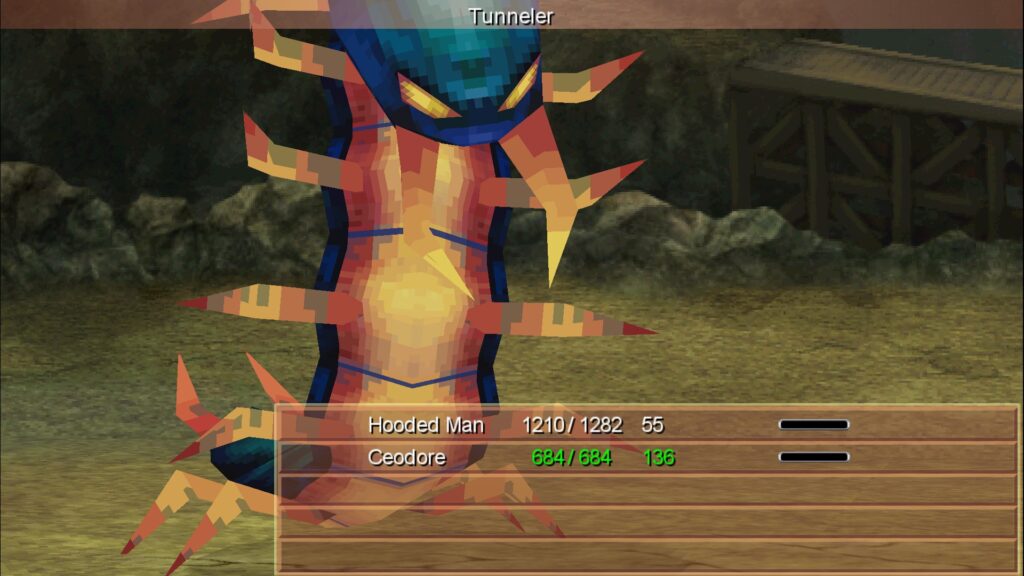
The tremors grow worse and a Tunneler emerges from the ground and attacks. We are in a moon phase where attacks are powered up, so it hits pretty hard.
I open with a Cross Slash Band and manage to use it one more time during the fight. The rest of the time I am attacking with the Hooded Man and healing with Cecil.
When we defeat it, it leaves a giant hole behind. We finally get back to where we were before Ceodore fell off the bridge, but now the soldiers are closing in.
We are starting to panic about what to do, when the mist in the cave thickens to the point where the soldiers can’t see us. They decide we must be somewhere closer to Baron and leave.
Ceodore says the mist saved us and the Hooded Man looks sad. After grabbing some loot, we exit the cave.
Mist
Ceodore questions the Hooded Man about why we would go to Mist when the mountain caved in, blocking it off from Baron. The Hooded Man says we are going to take advantage of that, because no one would expect we would flee there.
Ceodore asks why the Hooded Man is doing all of this for him. The Hooded Man says he isn’t doing it for Ceodore.
He explains there is a man he is after, a former dragoon from Baron. He must defeat him, even if it costs him his life.
Ceodore wonders if he is talking about Kain. Gee, ya think?
Tears of a Dragon
The scene shifts to Mysidia. We see the Elder, Porom, and the two generic mages. The elder says the dragon is crying and we see a shot of the two moons.
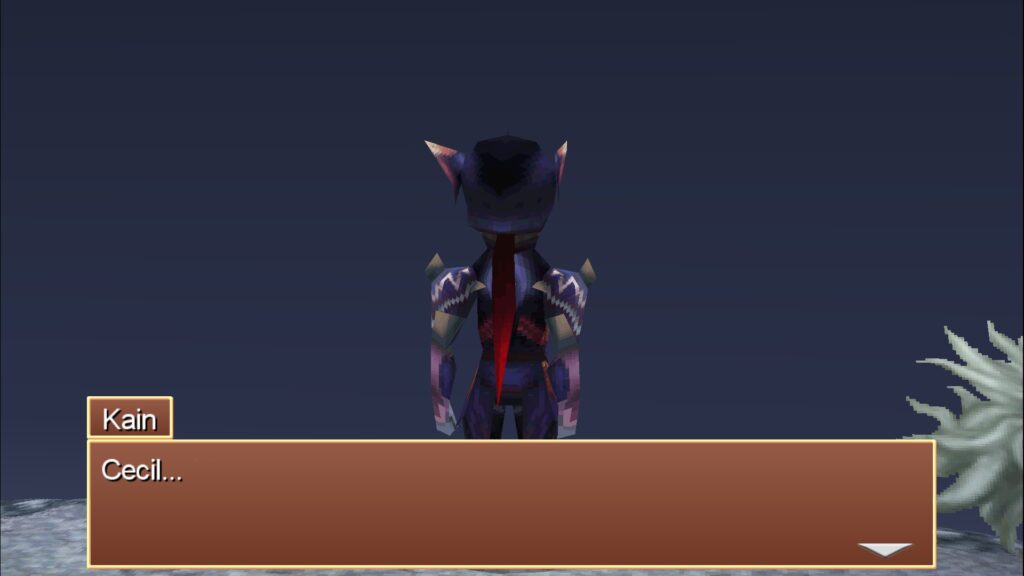
We then see Kain standing on Mt. Ordeals, speaking only the word, “Cecil…” Ceodore’s Tale ends.
Rydia’s Tale Prologue
The start screen for Rydia’s Tale says: Rydia returns to her second home in the Feymarch, only to find the Eidolon Queen unwelcoming. To make matters worse, suddenly the Eidolons all turn to stone. Rydia heads to the dwarven castle to investigate with Luca.
Flashback
The Village Chief and some of the villagers are gathered around the tomb of Rydia’s mother in Mist, sometime after the end of the war in the FFIV. Rydia arrives, in what is apparently the only outfit she has been wearing for over a decade.
King Edward also shows up. Rydia asks him why he is there and he says he’s doing what he can to revive the fortune of Mist.
Rydia is surprised, given that Damcyan is also rebuilding. Edward says Damcyan has many citizens to help with its reconstruction.
He says those with power, like himself and Cecil, must think about more than their own lands. The scene then shifts to Eblan, where the Seneschal is questioning why Edge is selling off many of Eblan’s treasures for profit.
Edge says there is nothing wrong with selling their treasures to help with Eblan’s recovery. Back at Mist, Edward says Cecil and Yang are also sending aid to help Mist.
After all, they couldn’t have won the war without Rydia’s help. The scene shifts again to Baron Castle.
A star is born
Cid is pacing and Cecil tells him to calm down. Cid says he can’t believe Cecil is so calm, given that Rosa has been in labor for half a day.
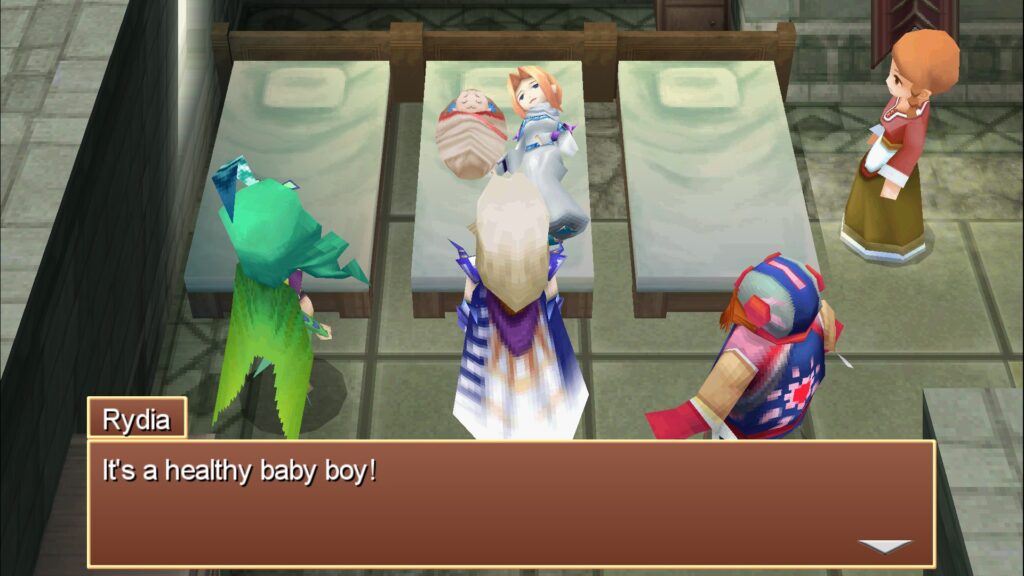
Rydia arrives, asking if it is over yet. We hear a baby cry and Cecil rushes off. We see a fully clothed Rosa, lying on a bed with a potato-shaped baby.
Cecil thanks Rosa and Rosa says, “Heh.” Rosa says the baby’s name is Ceodore.
A decade and some odd years later…
Back in the present day, some kids are looking for Rydia at her house in Mist. The Village Chief tells them that she has gone to her other home in the Feymarch.
The scene shifts to the Chamber of the Eidolon King. The Queen is bitchily telling Rydia that she is no longer welcome in the Feymarch.
Rydia says she just wanted to see everyone. The Queen says, well you have, so get the fuck out.
Rydia wants to know if she can at least come visit sometimes. The King thinks that wouldn’t hurt, but the Queen says no.
We then get a repeat of the scene we saw in Ceodore’s Tale, where the King teleports Rydia away, right before the Mysterious Girl shows up and turns the Eidolons to stone.
Village of the Eidolons
Rydia wakes in the Village of the Eidolons and quickly discovers that the Eidolons are all petrified. They can speak to her, but can’t move.
Pretty brutal to be fully conscious, but totally petrified. I find a treasure chest with an Ice Rod in it and equip it.
I also find some Kokkol Ore. I return to the Chamber of the Eidolon King, where I discover the king and queen are also petrified.

Rydia thinks this is her fault somehow and the reason the Queen didn’t want her in the Feymarch. She briefly flashes back to when Cecil and Kain destroyed Mist with the bomb ring.
She says she doesn’t want to lose anyone else. I leave the village and Rydia says she needs to tell everyone what happened as soon as possible.
Passage of the Eidolons
I encounter some goblins in the passage and Rydia attempts to cast a summon spell, but it doesn’t work. Fortunately, she can still cast her black magic spells.
After the battle, Rydia vows to save the Eidolons. I find a Feathered Cap in a chest and equip it.
Her name is Luca
I exit the passage and Rydia wonders where Luca and the Falcon are. A monster attacks and overwhelms Rydia.
Luca shows up and blasts it with the Falcon’s cannons. In another bizarre art choice, Luca, instead of looking like the rest of the dwarves, as she did in FFIV, now looks like an 80’s or 90’s era hip hop artist.
Unlike the other dwarves, she has a human-looking face. She is wearing some odd pink, blue, and white tracksuit-type thing with a visor and a weird little pouch on the front and some goggles.
Perhaps she is dressed for Pride, given that she’s wearing the trans pride colors. It’s a hideous outfit, but somehow still better than Rydia’s green bathing suit.
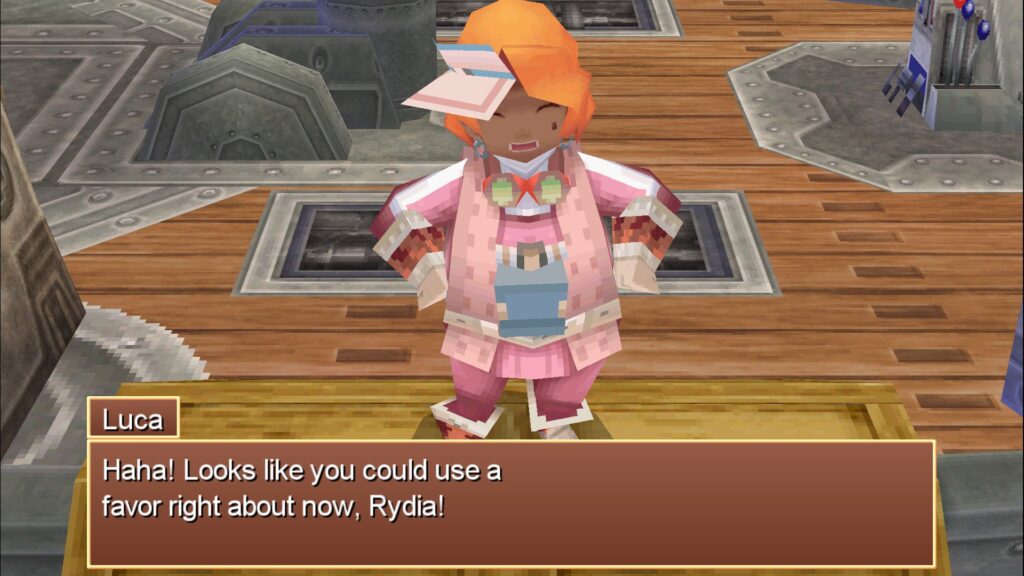
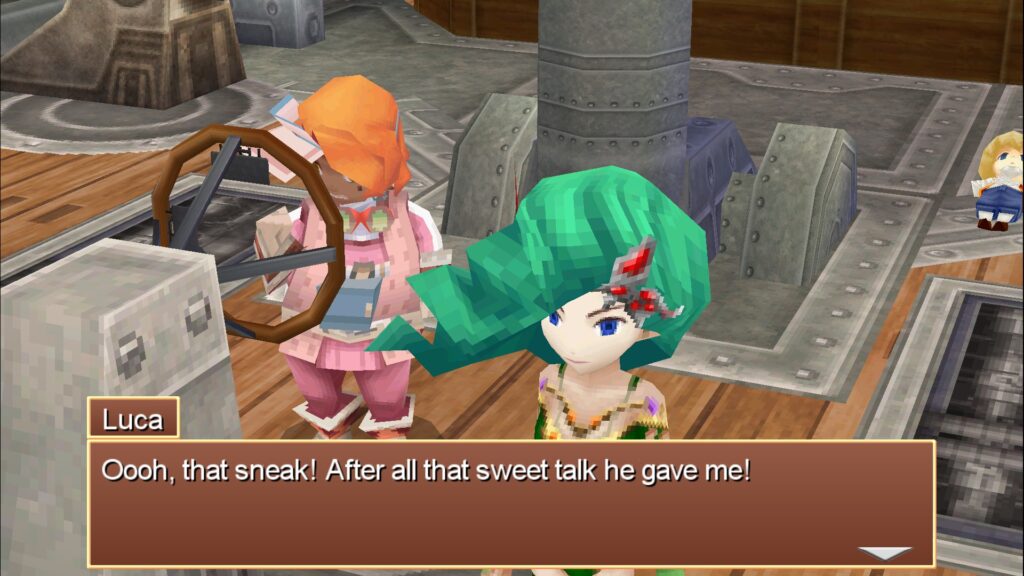
She says it looks like Rydia could use a favor. Rydia asks where she came from and Luca says she was bored, so she went to test out some engine improvements on the Falcon.
Rydia questions her about the crystal in the castle. Luca wonders why Rydia is concerned about that all the sudden.
Rydia tells Luca there is trouble. Luca says she thought so, given how much monsters have been multiplying lately.
The Red Wings attack the castle. Luca and Rydia hop on the Falcon and fly to the castle.
Here we go again
We go see King Giott and he reports that the Mysterious Girl stole their Crystal. Worse yet, she already stole two of the other Dark Crystals, leaving just the one in the Sealed Cavern.
Giott says the girl can summon Eidolons like Rydia. Rydia says something must have happened to Cecil and Baron for the Redwings to attack the castle.
Giott says the wars of the past are about to spring forth anew. Luca says she will go to the Sealed Cavern to protect the remaining Crystal.
Giott tells her to be careful. He says the Tower of Babil has been glowing ominously for days.
Before we set out, I loot the castle. I find some Warriors Clothes and several pieces of Kokkol Ore.
I also buy some supplies and equipment upgrades at the shops. I find a Soma Drop, and a Silver Apple, which Rydia uses. An iron shield goes to Luca.
The creepy dolls are back
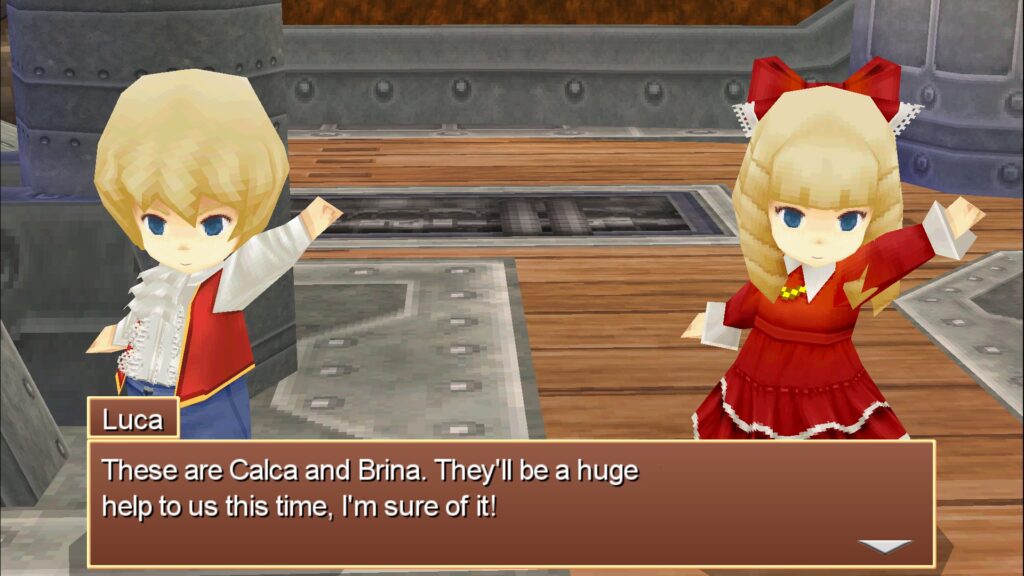
We board the Falcon and find Calca and Brina, the creepy dolls that attacked us for Golbez in FFIV, working on the ship. Luca has repaired them and turned them into her companions.
These two are possibly the most maligned characters in the game. Neither is very powerful and their low HP and defense makes them difficult to keep alive.
Regardless, we are stuck with them for this Tale. Calca has mediocre attack power and a special ability that may cast a random black magic spell.
Brina is weaker, but has a more useful special ability that results in a random healing or buffing spell for the party. Given that we have no true healers in this group, using her Dance ability every round helps reduce our reliance on potions.
Tomra
Luca suggests we go to Tomra to pick up some new gear, since Rydia can’t use her summoning magic. First, I stop by Kokkol’s Forge.
Kokkol died since the events of FFIV, but his apprentice is carrying on the work. He can use the Kokkol ore we have been finding to enhance existing weapons.
We have enough ore to get something made, but we don’t have the base weapon I want to upgrade yet, so I’ll come back later. We go on to Tomra and loot the town.
I find some Angel’s Clothes for Brina and several Kokkol Ores. One of the locals suggests that we “test yer mettle” in the Sylph Cave before going to the Sealed Cave.
The Sylph Cave
I don’t have enough money to upgrade my gear, so I decide to take the Tomran’s advice and go to Sylph Cave to plunder its treasure and boost my party’s levels before I go to the Sealed Cave. We start picking up levels pretty fast and learn and level up the Band skills, Lightning Brain Buster, Go! Calcabrina!, and Calca and Brina.
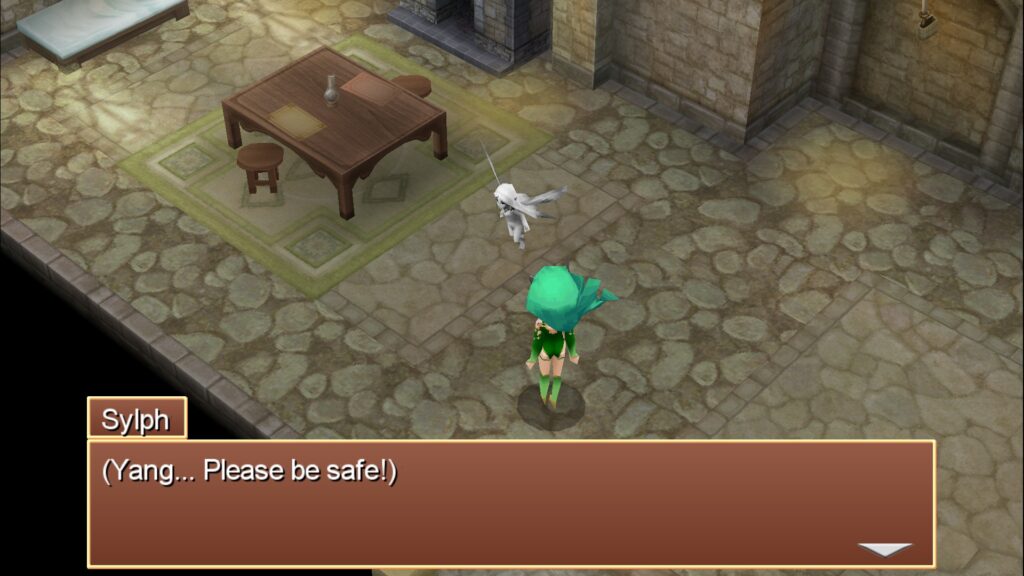
I find a Dagger for Calca, a Silver Armlet for Rydia, and some Kokkol Ore. When I reach the Sylvan Grotto, we find that the Sylphs were petrified like the rest of the Eidolans.
I also find a Mage’s Robe and Healing Rod for Rydia. The Grotto takes us out of the cave, so I fly back to the Dwarve’s base to use the free healing pot and then on to Tomra to restock supplies and buy new gear.
I then come back to the Sylvan Cave to loot the remaining treasures. I get some Clown’s Clothes for Calca, but don’t equip them.
I also find a Horned Helmet for Luca and a Mythril Knife for Calca. I equip the Dagger I found earlier on Brina and that’s it for the Sylphan Cave.
The Sealed Cave
We fly to the Sealed Cave and are relieved to find the seal still intact. Luca was concerned the Redwings might use their brute strength to force a way in.
She uses her necklace to open the door and we go inside. Like in FFIV, some of the doors in the cave turn into a monster.
These monsters have a powerful attack, but are slow to use it, so I cast Rydia’s Stop spell to give us time to take them out first. I find some Mage’s Clothes for Calca, but don’t equip them.
I get a Battle Axe and some Plate Mail for Luca. I find some additional Kokkol Ores.
We make it to the crystal room and take the Dark Crystal. The Demon Wall from FFIV attacks as we exit with it.
Demon Wall
Like the first time, it slowly closes in with each turn. I completely forgot about using Band abilities, but we didn’t need them to defeat the monster.
After the fight, Luca tells Calca and Brina they did well, even though they really didn’t do much. There are no random encounters as we work our way back out of the cave.
As we near the exit, Rydia flashes back to when Kain betrayed us in FFIV. The Mysterious Girl shows up, as expected.
Mysterious Girl
She recognizes Rydia as one of the last surviving summoners and Rydia recognizes her as the one responsible for petrifying the Eidolons. The Mysterious Girl tells Rydia the likes of her don’t deserve Eidolons or Crystals. Harsh.
She goes on to say that there is one who is far more worthy of the Crystals. Calca and Brina square up to the Mysterious Girl and she zaps them with her magic.
She calls them ridiculous toys and demands the Crystal. Rydia refuses and also gets zapped.
The Mysterious Girl takes the Crystal and says they now have all four Dark Crystals. Luca tries to stop her and gets zapped.
The Mysterious girl leaves, saying their lives are not her concern. Rydia revives and says they need to hurry before the enemy gets the Overworld Crystals also.
Luca is sad about Calca and Brina and vows to repair them. We leave the cave.
To the overworld
We get back on the Falcon and Luca complains that the Mysterious Girl didn’t even take us seriously. Not only did she not kill us, but she didn’t bother to disable the Falcon.
Luca says we will show her and declares we are headed to the Overworld. First, I fly back to the Dwarven Base to use the healing pot.
Then, I stop by Tomra for supplies and finally return to Kokkol’s Forge. I convert Luca’s Battleaxe to a Tomahawk and one of the Daggers to a Dancing Dagger.
The Overworld
We return to the overworld and Rydia asks Luca where we are going to go. Luca says we’ll sneak into Baron the back way.
We see Palom riding on a Black Chocobo with a girl on the back. Luca is pissed. Apparently, Palom had been flirting with her and now he’s flying around with some other girl.
Calca and Brina suddenly revive. At first, we’re happy, but the dolls attack. Rydia says the lightning strike must have affected them.
Luca says their behavioral circuits must have gone haywire. Rydia suggests we need to take them out, but Luca demands she allow her to deal with them herself.
Rydia stands there while Luca knocks out the dolls. While Luca is grieving over her toys, the Redwings attack.
Rydia takes the wheel and tries to fly us out of danger, but the ship is damaged and losing altitude. Luca pushes her out of the way and takes the ship in for an emergency landing.
We crash land on the island of Agart. Luca apologizes to her dolls.
She says the ship took some serious damage. She doesn’t respond when Rydia asks her if she can fix it.
Rydia imitates what she thinks Cid would say to snap Luca out of her moping. It works. Luca says she can fix the ship, but they need to find parts.
Agart
We go into the village of Agart to rest, purchase supplies and upgrade our equipment. Several villagers hint that we can find what we need in the mines to the east.
Agart Mines
We go into the mines. Without Brina’s dances, we must rely on potions and Rydia’s healing rod for recovery.
Fortunately, there is a healing pot in the mine we can use to restore HP and MP. I find some Mythril Gloves for Luca and some Adamantite.
Scattered throughout the game are various kinds of dragons that can drop a tail that we can exchange for high-end gear late in the game. However, the encounters and drops are rare and only happen during specific moon phases.
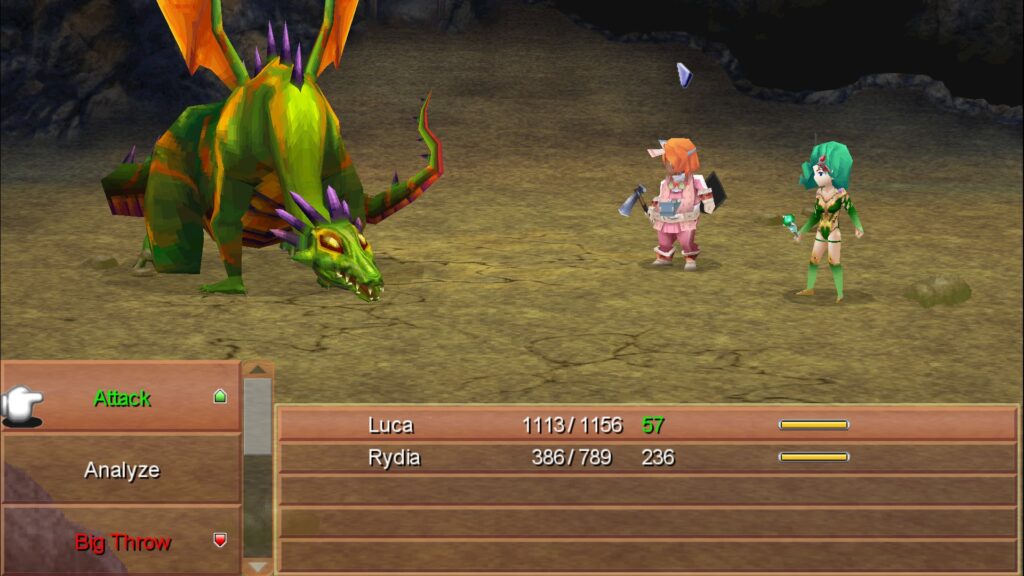
I run across one of the green dragons, but it wipes my party quickly. Fortunately, the game’s generous autosave feature lets me pick up right where I was before the fight.
I find a Circlet for Rydia. At the end of the mines, a monster emerges from a chest. It’s some type of giant tortoise.
It periodically builds up fire magic that we can counter with ice magic. However, it isn’t much of a factor, because I take it out with a couple Lightning Brain Busters before it can do much.
We get some Agartite, which Luca says she can use to repair the ship. On the way out, the bridge is blocked by two creepy puppets.
They are tougher than expected, but a pair of Lightning Brain Busters takes them out. We get some Mythril Springs.
Fixing the Falcon
I use the healing pot and then exit the cave. We get back on the Falcon and the two women set to work fixing it.
Unfortunately, the damage is worse than Luca thought and we can’t fix it with the material we have. She decides she will have to salvage some parts from Calca and Brina.
Rydia tells Luca not to do it and asks if she can use the Mythril Springs we got instead. Luca says not only can she fix the ship with them, but she can also repair Calca and Brina.
We get back to work and repair both the dolls and the Falcon. Our joy is short-lived.
Titan
The ground begins to shake and Titan appears. He attacks. Rydia pleads with him to stop, but he doesn’t listen.
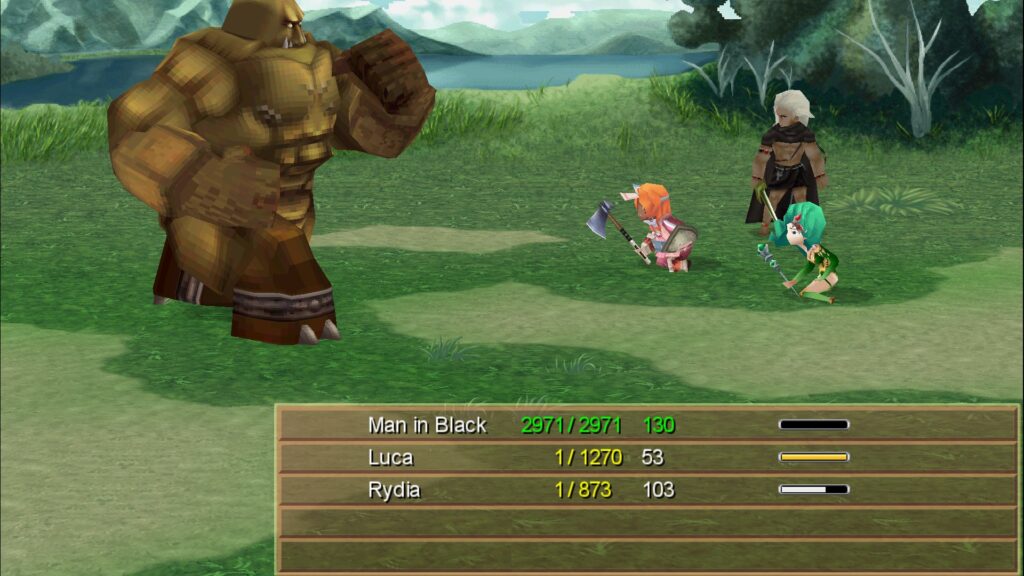
Eventually, he knocks our HP down to 1 each and a mysterious Man in Black shows up to save us. He tells us we need to leave for the tower.
He adds that the horrors of the past come to visit us again. Rydia asks who he really is and her tale ends.
Yang’s Tale Prologue
I start Yang’s Tale next. The start screen tells me that Yang is king of Fabul, but still trains with his monks daily.
His daughter Ursula, sneaks out to Mt. Hobs and Yang goes to fetch her back, but is shocked to find the Red Wings invading Fabul. The tale opens with Yang training with his monks.
No training for you
Yang, who is much whiter and blonder than I expected, kicks his monks’ butts and tells them to train harder. Ursula shows up and begs her father to allow her to train.
He says no. The Chancellor comes in with urgent news he says they need to discuss in the throne room.
Yang tells Ursula not to forget her position as princess of Fabul. In the throne room, Yang complains about Ursula’s stubbornness to his wife, who says she gets it from her father.
Cecil would never
The Chancellor tells Yang that dark shadows are looming over Baron and it has begun collecting Crystals again. Yang says the chancellor must be mistaken, because Cecil would never lead his nation astray.
The Duke consort says there is no denying the heroic acts Yang and Cecil performed to save their kingdom, but Baron’s previous ruler was similarly heroic before falling to the forces of evil.
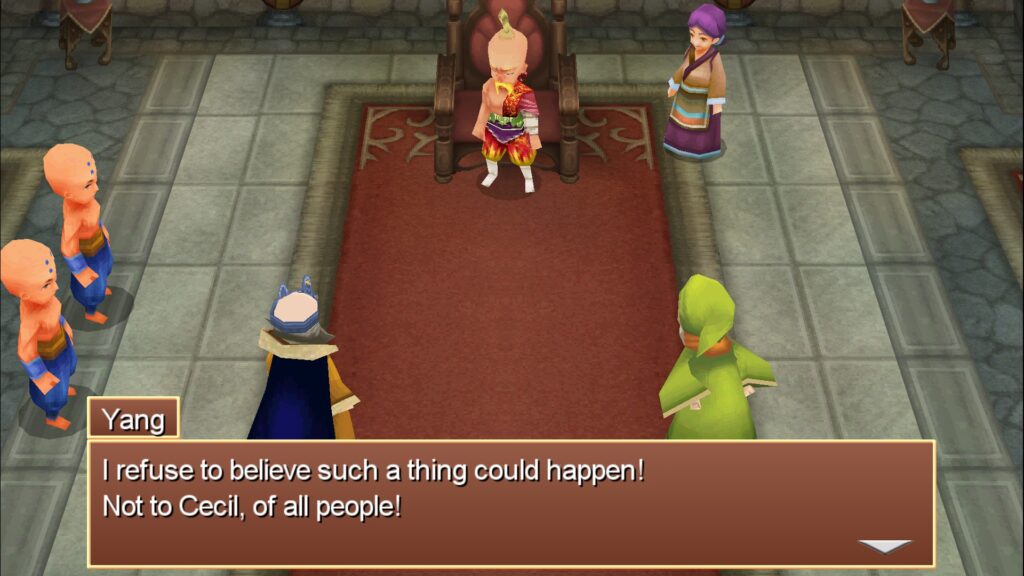
Yang insists that could never happen to Cecil. The Duke wants to know what is up with Baron gathering Crystals then?
Yang refuses to believe that is happening, saying Cecil and Rosa would stop it. A monk comes in and tells Yang that Ursula escaped.
Sheila says she is no doubt off to Mount Hobs. Yang says he will handle it. The Chancellor objects, saying they must do something about Baron.
Yang repeats that his trust in Cecil is firm. Yang and a pair of generic monks prepare to leave for Mt. Hobs.
Mt. Hobs
I loot the castle and then leave for Mt. Hobs. Yang is surprised by how far Ursula has made it before he spots her battling some goblins and a Mom Bomb.
She easily dispatches the goblins and tells Yang to stay out of the fight, but he insists the Mom Bomb is too tough for her to fight alone.
Yang and the generic monks join the fight, relegating Ursula to the back row. However, she can at least use her Chakra ability from there, which restores some HP to a party member.
The Mom Bomb fight is tougher. She eventually blows up and explodes into several regular bombs.
I attack with Yang and the generic Monks and heal the party with Ursula’s Chakra as needed. I eventually win.
Yang calls Ursula foolish and scolds her for disobeying him and running off into the wilderness. He demands to know why she did it.
The shooting star
Ursula tells him she saw a shooting star land near Mt. Hobs, but kept that information to herself, because she knows Yang wouldn’t let her go investigate. Yang says that she’s right and now she is to return to the castle.
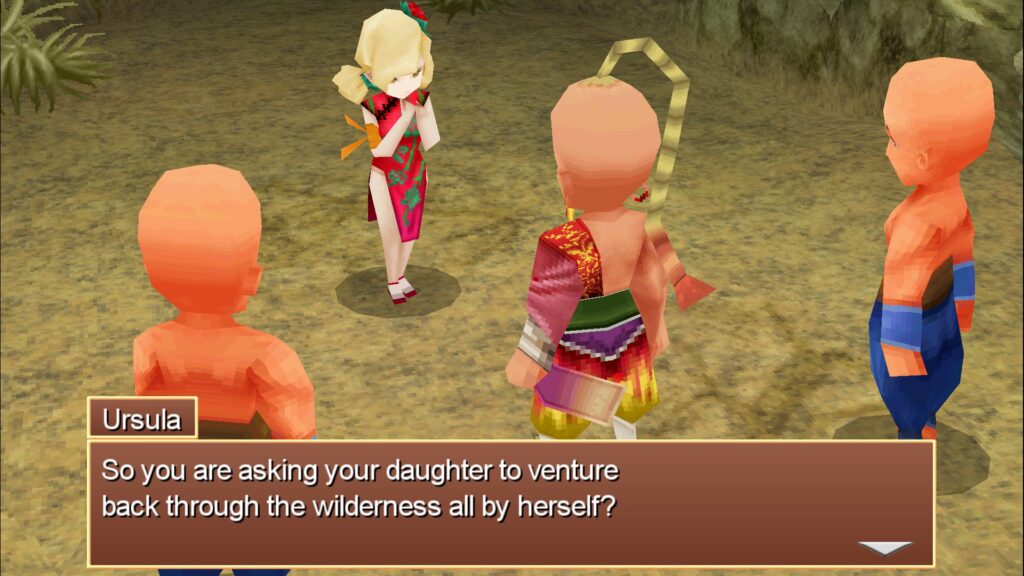
Ursula begs to come along, but Yang says no. She then switches tactics, pointing out that Yang is asking her to go back through the wilderness all by herself.
The generic monks say they will protect Ursula and Yang agrees to let her come. We learn the band skill Five Star Crimson Palm.
I find another Namingway and purchase some supplies. I find a Kenpo Gi and a Power Armlet and give them to Ursula.
Meteor Site
We exit Mt. Hobs and find the spot where the shooting star crashed. Ursula says it looks like the earth is rotting.
Yang says it is more than that. He feels an intense power nearby. We investigate the crash site and find a Silver Armlet in a chest that goes to Yang.
He also gets some Faerie Claws, a Headband, Hell Claws, and Metal Knuckles. As he upgrades his gear, I give his cast-offs to Ursula and the generic monks.
I find some Adamantite. We discover a grave that marks the spot where a group of Fabul monks died.
Yang says that must have been the high monks who left for Mt. Hobs to train. Three Sylphs appear and tell Yang to stay on his guard.
They tell him that “they” have come for the Sylphs and will come for the Crystals next. The Sylphs disappear.
Yang says we must return to Fabul at once. We leave the crash site.
Those fucking Redwings again
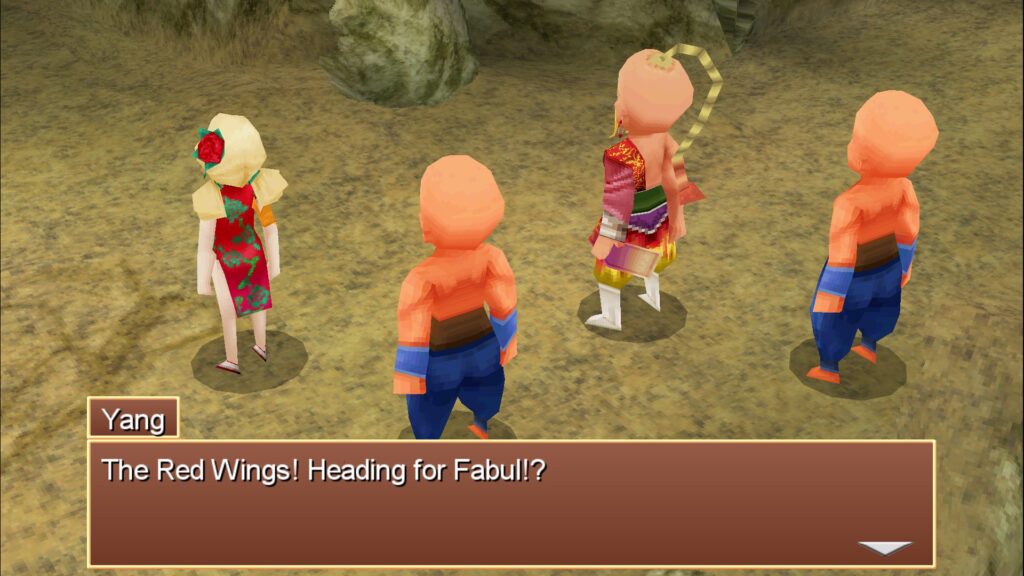
We must cross Mt. Hobbs to get back to Fabul. Near the summit, we spot the Redwings approaching Fabul.
We return to the castle and warn everyone that the Redwings are approaching. The Duke Consort concludes that the rumors about Baron are true.
Ursula wants us to protect the Wind Crystal at all costs, but the Duke fears that will lead to much bloodshed. Yang says something must have happened to Cecil and he will not hand over the Wind Crystal.
History repeats again
Yang says he will go to the gates to greet the soldiers. Ursula wants to come, but Yang tells her stay behind.
He says she must protect the kingdom and her mother if something happens to Yang. Yang gathers the monks and prepares to defend the castle.
Yang greets the soldiers at the gates and asks how Cecil is. The soldiers immediately attack.
Just like in FFIV, we defeat them easily, but keep getting pushed further into the Castle by Baron’s overwhelming numbers. Yang recognizes the pattern repeating.
Yang gets pushed back to the throne room and is dismayed to discover that Ursula and Sheila are still there, instead of in hiding. He convinces Ursula to take her mother and go to the Crystal Chamber.
Yang fights off some more monsters and someone Yang recognizes speaks from off screen. He apologizes for being scarce of late.
Fucking Kain
The scene shifts to the Crystal Chamber. Kain walks in. Sheila thinks he is there to help, but he says he is there to help himself to the Crystal.
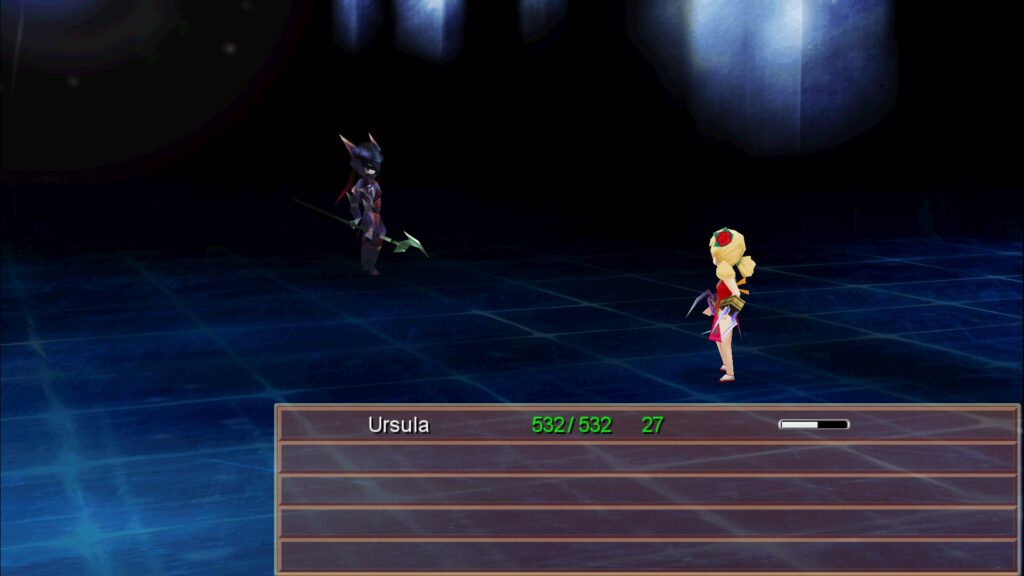
Ursula confronts Kain. After a few rounds, Yang joins the battle.
Kain starts using his jump attack. I use that time to heal with Ursula’s Chakra and power up Yang’s attack with his Focus ability.
We defeat Kain and master the Five Star Crimson Palm band. Kain is impressed by Ursula’s skill, but says it doesn’t matter.
He jumps over Yang and Ursula and steals the Wind Crystal. He tells Yang that this isn’t like before.
He is not being controlled. He is doing this of his own free will.
Yang mopes
Back in the throne room, Yang apologizes for failing to protect the Wind Crystal. Ursula tells him it isn’t over yet.
They can still take back the Crystal. Yang flashes back to when young Rydia scolded Cecil, Edward, and Yang about giving up after Rosa was captured and Kain stole the Crystal in FFIV.
He tells Ursula she is right. He will go to Baron to see Cecil. Yang instructs Ursula to take care of the castle for him, but of course, she wants to go with him.
Sheila takes Ursula’s side. Yang agrees to let Ursula go and apologizes to the Duke Consort for his selfishness.
The Duke says he isn’t too old to serve his kingdom. Sheila assures Yang that they will keep everything running while he is gone.
The Duke says Yang must take a ship to Baron. I hit up the shops to restock supplies and upgrade my equipment.
I walk over to the docks and save. I quit one hour and 22 minutes into Yang’s Tale.
Leave a Reply