On day eight of my Final Fantasy Marathon, I completed my second playthrough of Final Fantasy Pixel Remaster. Today, I am starting Final Fantasy II Pixel Remaster.
As with the first game, I have already completed all the Steam achievements, so I won’t be covering those here. I only plan to do one playthrough of this one.
Unlike the first game, there are no classes. There are different skills you can learn, and instead of improving them by gaining levels, you get better at various skills by doing those skills.
For example, if you use your sword in battle, your sword skill improves. This allows you to customize your characters. However, I don’t find using the different skills interesting enough to make it worth playing multiple times to create characters that are good at different things.
In the party creation screen, the only choice you get to make is what to name your four characters. The game assigns the default names Firion, Maria, Guy, and Leon.

I named my characters Rand, Elayne, Perrin, and Galad. The game opens with a cutscene that explains the story so far.
A kingdom at war
A once peaceful kingdom is now at war thanks to the actions of an evil emperor. The parents of our young adventurers were killed in the Empire’s attack, forcing them to flee their homes.
The action begins with an unwinnable battle against four Black Knights. The Black Knights quickly slaughter our party, but Princess Hilda rescues us and takes us back to her rebel hideout in Altair.
A White Wizard named Minwu heals our wounds. Rand awakes alone, but quickly finds Perrin and Elayne.
Elayne’s brother Galad is missing. We go to Princess Hilda and ask to join the rebel army, but she says we are too young and inexperienced.
However, because we have nowhere to go, she gives us the password to the Rebel hideout and tells us we can stay there. This introduces us to another unique gameplay element.
The keyword system
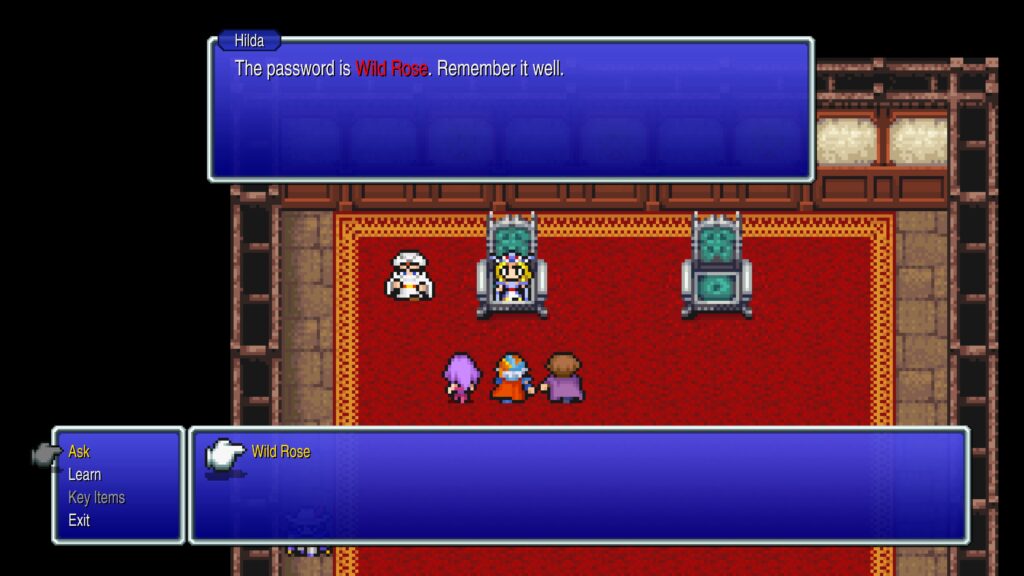
Throughout the game, NPCs will mention words and phrases you can learn and then ask NPCs about to get information or trigger events. In this scene, you can learn the password “Wild Rose.”
Hilda tells us that Elayne’s brother may be a prisoner in the town of Fynn. She warns us that the town has been overrun by monsters and Imperial soldiers.
Hilda tells us to speak to Minwu. Minwu tells us to begin the journey to realize our fate by going to Fynn.
Journey to Fynn
Any character can use any equipment and up to 16 spells. Before leaving, I purchase the Cure spell for Elayne and the Fire spell for Rand and some potions and antidotes from the item shop.
We arrive in Fynn, finding most of the buildings under guard by soldiers. However, we manage to get inside the pub and find a member of the rebellion tending bar.
We give the bartender the password and he shows us a secret passage that leads to a wounded soldier. The soldier is Scott, the prince of Kashuan.
He is gravely wounded and dies after giving us his ring and asking us to carry some messages. He wants us to tell his brother Gordon to have faith in himself and that the reason Fynn fell is because Count Borghen betrayed us.
He also asks us to tell Hilda he loves her, but then changes his mind, fearing the message will only bring her pain. We return to Fynn and give Gordon the message, which has no immediate obvious impact.
Joining the rebellion
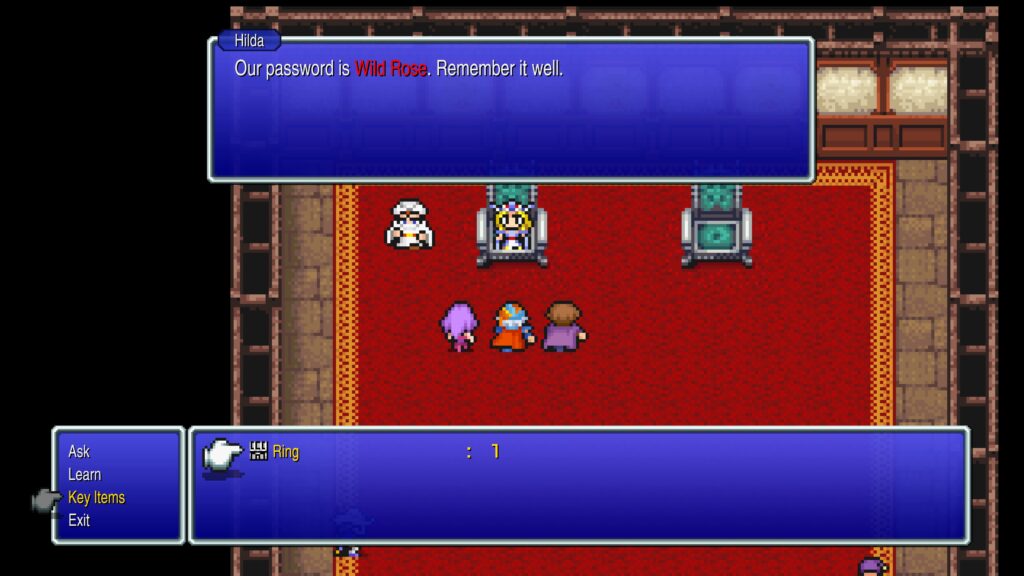
Using the “Key Items” command, we show Hilda Scott’s ring and tell her he died. We try to give her the ring, but she tells us to keep it.
Hilda decides she underestimated us and wants us to join the rebellion. She tells us about a magical metal called Mythril.
Hilda explains that the Empire used their superior Mythril weapons to defeat us and we must find a source for ourselves. However, the Rebels have lost contact with Josef, the man charged with finding a source of mythril.
Hilda asks us to go to Salamand with Minwu to find out what happened to Josef. Minwu tells us we must pass through the town of Paloom to get to Salamand and gives us his canoe so we can cross the lake to get there.
Minwu then joins our party. I remove his equipment and then distribute it to my other party members, giving him the leftovers.
In search of mythril
After restocking supplies, I leave for Paloom, where I pay to take a ship to Poft. In Poft, I meet a man named Cid, who offers to hire out his Airship to take me to Salamand, but the price is too steep, so I elect to walk.
I find Josef in Salamand, who tells us that the Empire has enslaved the men of the town and forced them to work in the mines at Semmit Falls. He says he’ll tell us what he knows about the mythril if we rescue them.
Semmit Falls rescue
I purchase a longsword for Rand and rest at the inn, and then head for Semmit Falls. Inside the cave behind the falls, I find the thief Paul.
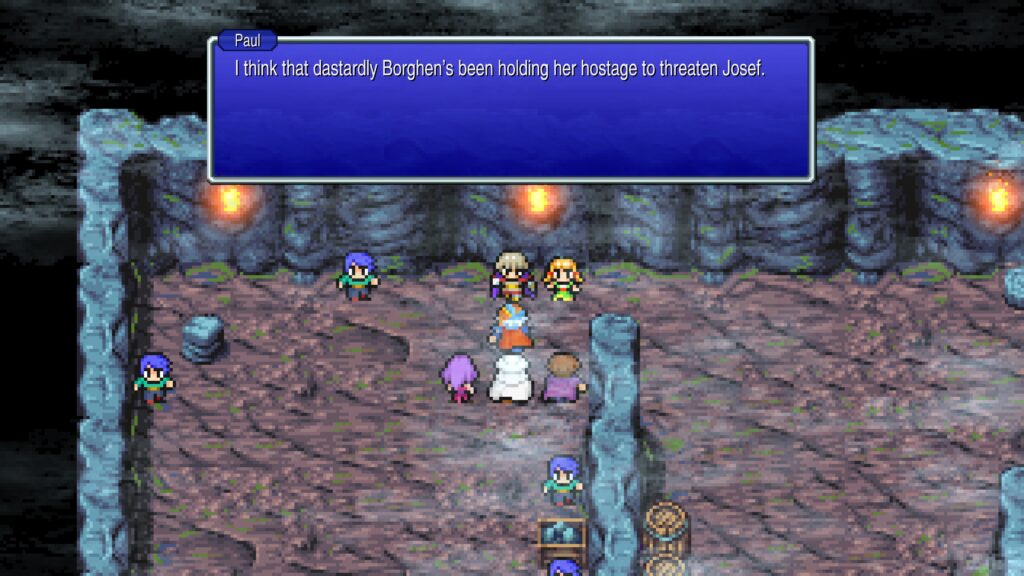
Paul found out Hilda had asked us to bring back the mythril and decided he’d beat us to the punch. However, the Empire captured him.
Paul found the Empire was also holding Josef’s daughter Nelly, along with the men from the town. Paul believes that Borghen is holding Nelly hostage to keep Josef in line.
Paul says he is in over his head, but will get the prisoners out while we go after the mythril. Along the way, I find a Fire Tome in a chest.
The search continues
Magic tomes can be used in two ways. You can keep them in your inventory and use them as an item in battle for a one-time cast of their spell.
Alternatively, any character who doesn’t already know the spell and hasn’t already learned 16 spells can read the tome to learn the spell. I have Elayne read the tome.
Green Slimes begin appearing as a random encounter. These enemies are highly resistant to physical attacks, but weak to magic attacks.
I find an unnamed enemy guarding a chest who promises to put his mythril blade through my heart. Engaging with him triggers a battle with a Sergeant. The Sergeant is nearly impervious to physical attacks, but can be damaged with magic.
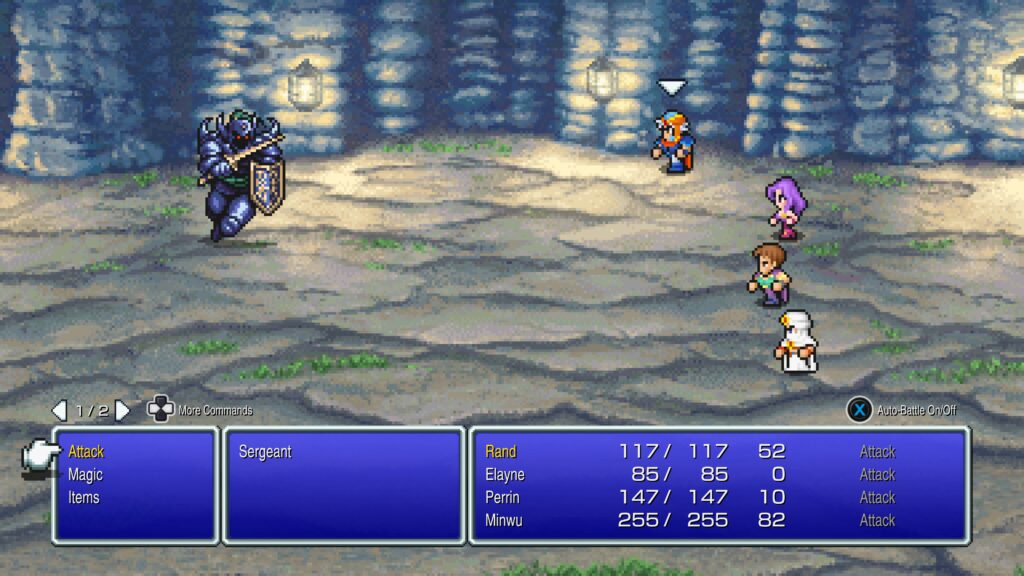
Minwu has no attack spells and Elayne has no MP left, so I have Rand cast his Fire spell and Minwu heal the party. It takes several rounds, but the Sergeant eventually falls.
I find mythril in the chest the Sergeant was guarding. There is one more chest in the cave.
It contains a monster-in-a-box encounter with a Land Turtle. The Land Turtle is highly resistant to physical attacks, but weak to magic, so I use the same strategy against it as the Sergeant.
I get the Teleport Tome from the box and have Elayne learn the spell. I then have Minwu Teleport us out of the cave.
Return to Altair
We walk back to Salamand and talk to Josef, but he just tells us to take the mythril to Princess Hilda. I rest at the inn, buy a Life Tome for Elayne and then travel back to Altair.
Hilda tells us that the Empire is building a massive airship called the Dreadnought in Bafsk. When we show her the mythril, she tells us to take it to Tobul, the town blacksmith.
Tobul uses the mythril to craft weapons and armor that we can now purchase at the weapon shop. However, I can’t afford any of it at the moment.
Hilda believes that the Empire may be vulnerable due to our theft of the mythril. She asks us to go to Bafsk and stop the Empire from completing the Dreadnought.
Mission to Bafsk
We journey back to Poft and I pay Cid to fly us to Bafsk on his airship. In Bafsk, we find a rebel disguised as an Imperial soldier.
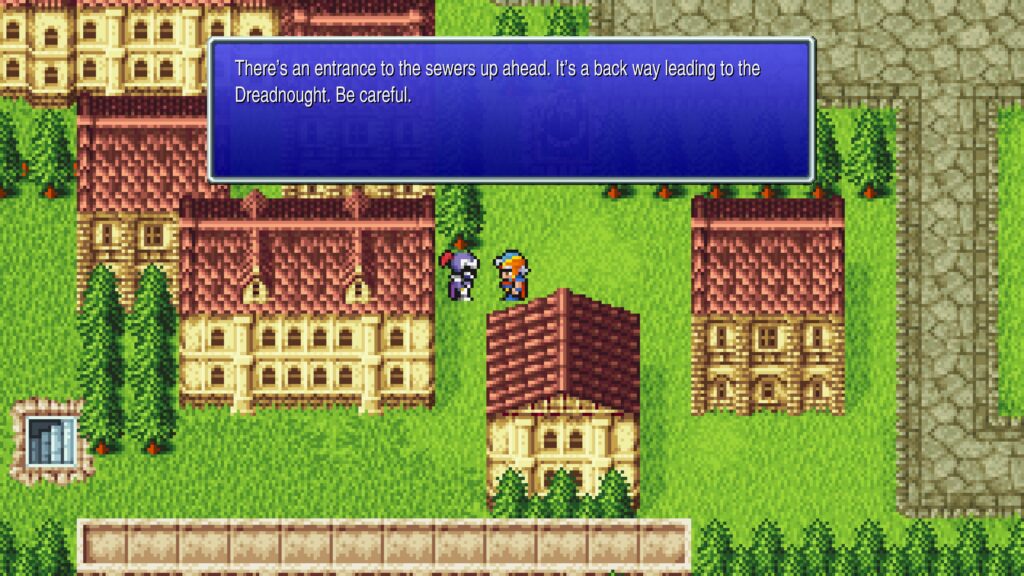
He shows us an entrance to a sewer that will take us to the Dreadnought. We journey through the sewer until we encounter the Dark Knight.
He tells us that we are too late and the Dreadnought is already complete. The Dark Knight says that kneeling to the Emperor is the only option we have left and then leaves.
Borghen shows up and laughs at us before also leaving. We follow him outside and watch the Dreadnought takeoff.
We then get a cutscene of the Dreadnought bombarding several Rebel towns. We go back in the sewer and retrieve a pass from a chest in Borghen’s room, because apparently he lives in the sewer?
We also find a warp pad that takes us outside the town. I purchase the Esuna Tome for Elayne before returning to Altair.
The aftermath
The towns we pass through all show damage from the bombardment, and the rebels suffered many casualties in the attack. Hilda tells us that the shock of the attack has caused her father’s condition to worsen.
Minwu leaves the party to take care of the King. He tells us we must destroy the Dreadnought quickly.
A townsperson suggests I talk to Cid to find out any weaknesses the Dreadnought may have. I purchase a Mythril Shield and Mythril Helm for Rand and then leave for Poft.
Destroying the Dreadnought
Cid tells me that blowing up the Dreadnought’s engine will take it down. He also says that airships run on Sunfire, a volatile substance that can cause the engine to blow if the flames get too high.
I return to Altair and ask Hilda about Sunfire. She tells me it is the crest of the Kingdom of Kashuan and its flame burns on the ground floor of the keep.
However, we can’t just use any old torch to carry the flame back with us. I tell Hilda that Cid told us to use Sunfire to destroy the Dreadnought.
Hilda tells us to leave for Kashuan Keep at once. Since we still don’t know how to transport the Sunfire, I ask Minwu about it.
He tells me the Kashuan people move the Sunfire to Egil’s Torch when they clean the brazier. The King tells me that Scott sealed the gates of Kashuan Keep to protect the Sunfire if the kingdom fell.
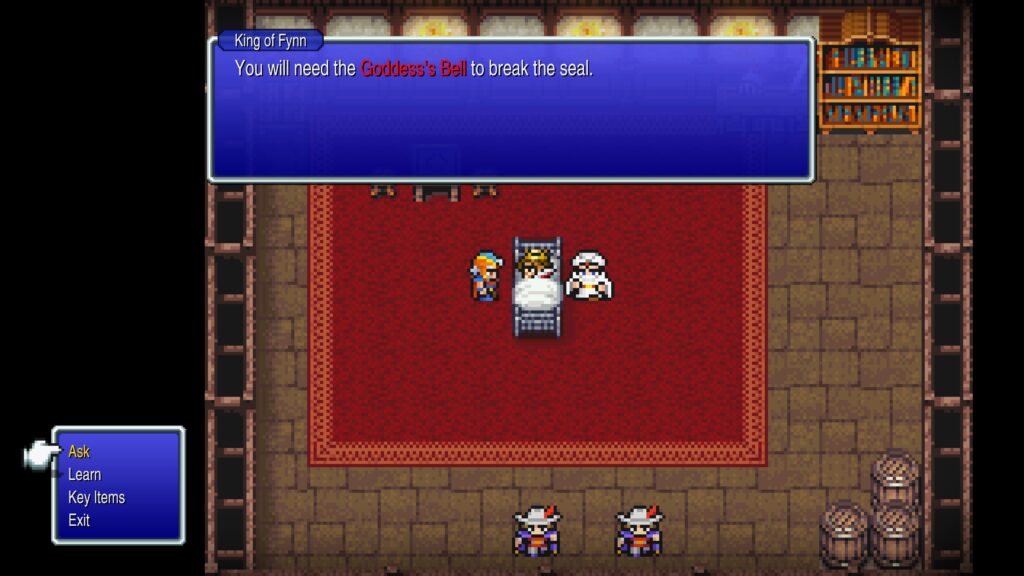
The King tells me I need the Goddess’s Bell to break the seal. Unfortunately, only the members of the Kashuan royal family know where to find it.
Minwu tells me that Gordon would know where to find the bell, but he disappeared. Minwu suggests someone who is close to Gordon or Scott might know where to find the bell.
I go back to Hilda and ask about the bell. She tells me that the gates of Kashuan Keep will only open to the voice of a Kashuan or the ringing of the Goddess’s Bell, something she might have mentioned earlier…
Hilda says the bell is deep inside a cavern on the snow plains. She tells me Josef knows the snow plains well and I should ask for his help.
Quest for fire
I travel to Salamand and ask Josef about the bell. He tells me I need a snowcraft to get to the cavern.
Josef has a snowcraft that he stashed in the mines. He joins our party to help us retrieve it.
We go to the mines and Josef opens the secret passage to the room where he stashed the snowcraft. We take the snowcraft and travel north to the snowfield.
The Snow Cavern
We use the snowcraft to cross the snowfield and enter the Snow Cavern. I find an Antartic Wind in a treasure chest, which is an item I can use in battle to cast a powerful ice spell.
I also find a Battle Axe, which I give to Perrin. I confront six Grenades in a monster-in-a-box encounter.
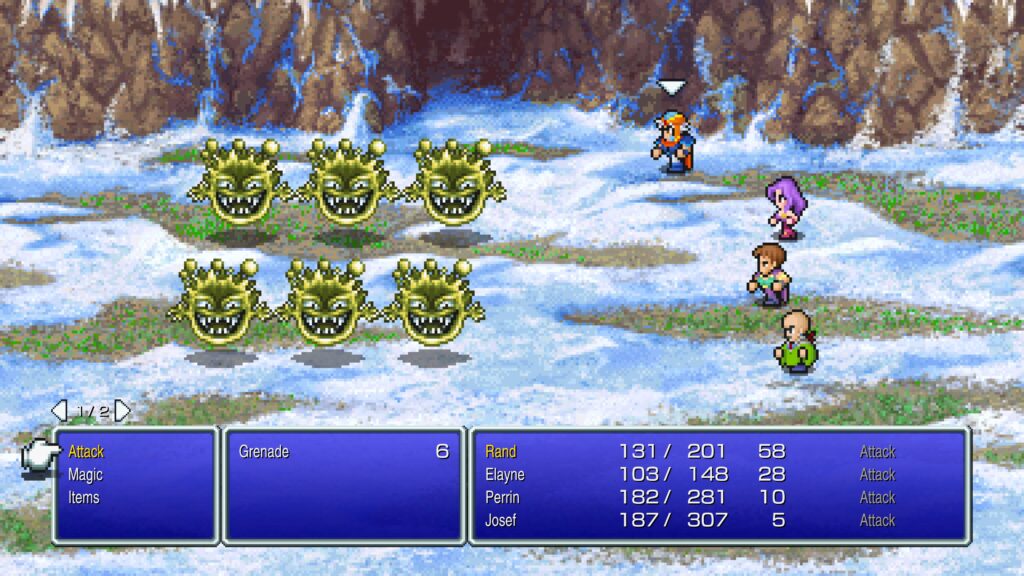
These enemies can do a lot of damage if they successfully self-destruct. I manage to take them down, but Rand dies twice.
I find a Blizzard Tome in another chest, which I give to Rand. A second monster-in-a-box fight features three Ghouls and Three Shadows.
I receive the Ancient Sword when I defeat them and give it to Rand. Eventually, we come to a room with a bunch of talking beavers in it.
Fortunately, Perrin speaks beaver. He asks them about the bell and they direct him to a secret passage and tell him a monster guards the bell.
I find a Silver Cuirass in a treasure box and give it to Rand. I then confront the monster, which is another giant turtle, called an Adamantoise.
Like the Land Turtle, it is highly resistant to physical attacks, but vulnerable to cold spells. I take it down quickly by casting Blizzard with Rand and using the Antarctic Wind item.
I retrieve the Goddess’s Bell from the wall, which opens up a shortcut out of the cavern. However, Borghen is waiting for us on the stairs.
Josef’s sacrifice
He says the Emperor will kill him for letting us get the bell, but if he must die, he is going to take us down with him. Borghen attacks.
We defeat Borghen easily, but he tells us he booby trapped the cavern. Borghen tells us he will see us in Hell and then dies.
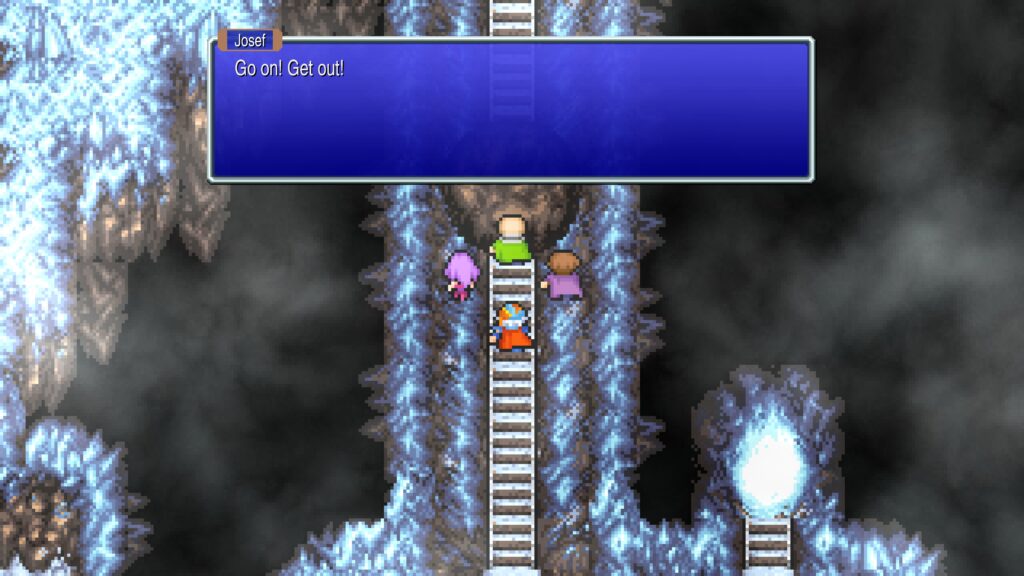
A giant, Indiana Jones-style boulder rolls down the stairs after us. We can’t outrun it, so Josef holds it long enough for the rest of us to escape.
However, the boulder crushes Josef and he dies. We leave the cavern and return to Salamand.
Kashuan Keep
I rest at the inn and purchase some supplies before returning to Poft. I then hire Cid’s airship to take to me Kashuan.
I use the Goddess’s Bell to unlock the door to the keep. Inside, we find Gordon.
Gordon says he came to retrieve the Sunfire, because he didn’t think anyone else could get in the Keep. However, he found the place full of monsters and had to retreat.
He asks to join our party and we tell the loser to get lost. Just kidding, we let him join.
I find a Cure Tome in a chest and give it to Rand. We encounter five Wererats in a monster-in-a-box fight and defeat them to get a Golden Shield.
I initially give it to Rand, but later decide that since the better armor interferes with magic in this game, I should give the best of my armor to Perrin. I get a Blind Tome as a drop from a random encounter and give it to Rand.
I get a Mythril axe from a box and give it to Perrin. I get a Sleep Tome from a random encounter and give it to Rand.
I get some Golden Armor from a chest and give it to Perrin. We find a Red Soul guarding Egil’s Torch.
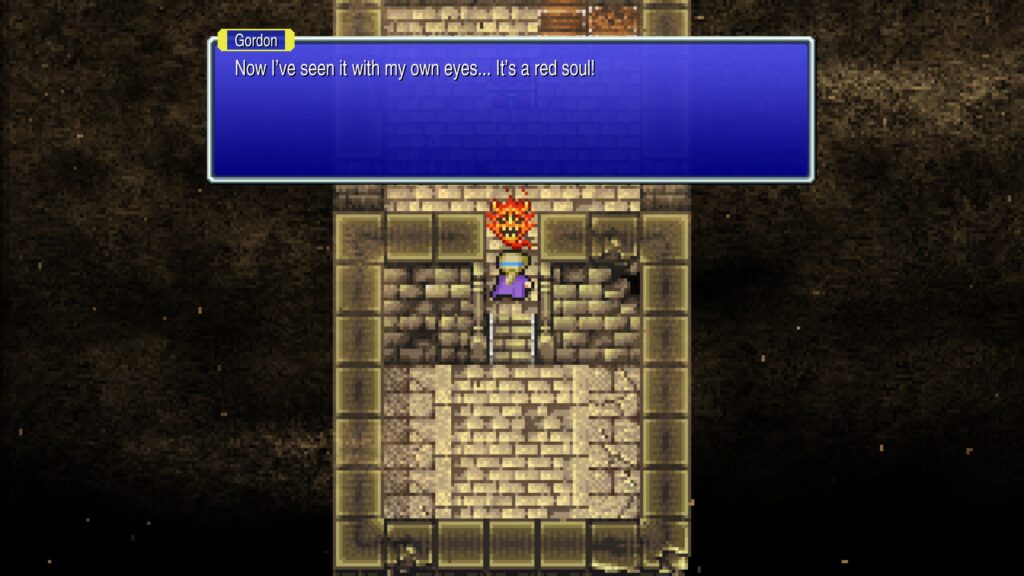
It has high resistance to physical attacks, but my magical attacks heal it. I wail away at it until it eventually dies.
I get Egil’s Torch from the chest it was guarding. I use Elayne’s Teleport spell to leave the Keep.
I walk back into the Keep and use Egil’s Torch to get the Sunfire. When we leave the Keep, I see a cutscene of the Dreadnought chasing and then capturing an airship and flying away with it.
I save the game outside the Keep and quit. I am three hours and 29 minutes in.
Leave a Reply